이번 google I/O도 그렇고 꾸준히 firebase를 밀고 있다.
디비 뿐만 아니라 정적 호스팅도 해준다는 소식에 혹 해서 살짝 내용을 살펴보았다.
https://firebase.google.com/docs/hosting/quickstart
https://console.firebase.google.com/
먼저 firebase 콘솔로 들어가서 프로젝트를 하나 만들자.
Add Project를 누르면
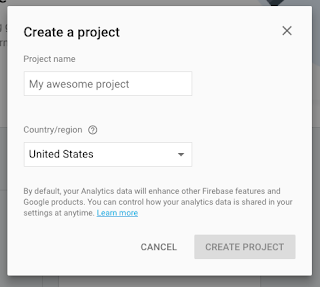
프로젝트 이름과 지역을 설정할 수 있다.
적절히 넣어주고 Create Project하여 프로젝트를 만들고
당연한 이야기지만 0.10.x 이상의 Node.js를 설치한 상태로 firebase-tools를 먼저 설치하자
다 되면 폴더를 하나 만들고 그 안에서 init으로 초기화를 하자.
mkdir exam1
cd exam1
firebase init
🔥🔥🔥🔥🔥🔥🔥🔥 🔥🔥🔥🔥 🔥🔥🔥🔥🔥🔥🔥🔥 🔥🔥🔥🔥🔥🔥🔥🔥 🔥🔥🔥🔥🔥🔥🔥🔥 🔥🔥🔥 🔥🔥🔥🔥🔥🔥 🔥🔥🔥🔥🔥🔥🔥🔥
🔥🔥 🔥🔥 🔥🔥 🔥🔥 🔥🔥 🔥🔥 🔥🔥 🔥🔥 🔥🔥 🔥🔥 🔥🔥
🔥🔥🔥🔥🔥🔥 🔥🔥 🔥🔥🔥🔥🔥🔥🔥🔥 🔥🔥🔥🔥🔥🔥 🔥🔥🔥🔥🔥🔥🔥🔥 🔥🔥🔥🔥🔥🔥🔥🔥🔥 🔥🔥🔥🔥🔥🔥 🔥🔥🔥🔥🔥🔥
🔥🔥 🔥🔥 🔥🔥 🔥🔥 🔥🔥 🔥🔥 🔥🔥 🔥🔥 🔥🔥 🔥🔥 🔥🔥
🔥🔥 🔥🔥🔥🔥 🔥🔥 🔥🔥 🔥🔥🔥🔥🔥🔥🔥🔥 🔥🔥🔥🔥🔥🔥🔥🔥 🔥🔥 🔥🔥 🔥🔥🔥🔥🔥🔥 🔥🔥🔥🔥🔥🔥🔥🔥
You're about to initialize a Firebase project in this directory:
/Users/spectrum/Documents/js/_firebaseApp/sheepals
? Which Firebase CLI features do you want to setup for this folder? Press Space to select featur
es, then Enter to confirm your choices.
⚠ You have have not selected any features. Continuing will simply associate this folder with a Firebase project. Press Ctrl + C if you want to start over.
디비 뿐만 아니라 정적 호스팅도 해준다는 소식에 혹 해서 살짝 내용을 살펴보았다.
https://firebase.google.com/docs/hosting/quickstart
https://console.firebase.google.com/
먼저 firebase 콘솔로 들어가서 프로젝트를 하나 만들자.
Add Project를 누르면

프로젝트 이름과 지역을 설정할 수 있다.
적절히 넣어주고 Create Project하여 프로젝트를 만들고
당연한 이야기지만 0.10.x 이상의 Node.js를 설치한 상태로 firebase-tools를 먼저 설치하자
npm install -g firebase-tools좀 시간이 걸린다.
다 되면 폴더를 하나 만들고 그 안에서 init으로 초기화를 하자.
mkdir exam1
cd exam1
firebase init
🔥🔥🔥🔥🔥🔥🔥🔥 🔥🔥🔥🔥 🔥🔥🔥🔥🔥🔥🔥🔥 🔥🔥🔥🔥🔥🔥🔥🔥 🔥🔥🔥🔥🔥🔥🔥🔥 🔥🔥🔥 🔥🔥🔥🔥🔥🔥 🔥🔥🔥🔥🔥🔥🔥🔥
🔥🔥 🔥🔥 🔥🔥 🔥🔥 🔥🔥 🔥🔥 🔥🔥 🔥🔥 🔥🔥 🔥🔥 🔥🔥
🔥🔥🔥🔥🔥🔥 🔥🔥 🔥🔥🔥🔥🔥🔥🔥🔥 🔥🔥🔥🔥🔥🔥 🔥🔥🔥🔥🔥🔥🔥🔥 🔥🔥🔥🔥🔥🔥🔥🔥🔥 🔥🔥🔥🔥🔥🔥 🔥🔥🔥🔥🔥🔥
🔥🔥 🔥🔥 🔥🔥 🔥🔥 🔥🔥 🔥🔥 🔥🔥 🔥🔥 🔥🔥 🔥🔥 🔥🔥
🔥🔥 🔥🔥🔥🔥 🔥🔥 🔥🔥 🔥🔥🔥🔥🔥🔥🔥🔥 🔥🔥🔥🔥🔥🔥🔥🔥 🔥🔥 🔥🔥 🔥🔥🔥🔥🔥🔥 🔥🔥🔥🔥🔥🔥🔥🔥
You're about to initialize a Firebase project in this directory:
/Users/spectrum/Documents/js/_firebaseApp/sheepals
? Which Firebase CLI features do you want to setup for this folder? Press Space to select featur
es, then Enter to confirm your choices.
⚠ You have have not selected any features. Continuing will simply associate this folder with a Firebase project. Press Ctrl + C if you want to start over.
=== Project Setup
First, let's associate this project directory with a Firebase project.
You can create multiple project aliases by running firebase use --add,
but for now we'll just set up a default project.
? Select a default Firebase project for this directory: sheepals (sheepals-2f2d6)
i Writing configuration info to firebase.json...
i Writing project information to .firebaserc...
✔ Firebase initialization complete!
여기선 깨지는데 터미널에서 공격적인 Firebase ASCII ART를 볼 수 있다.
초기화가 끝나고 나면 덜렁 firebase.json과 .firebaserc 두 파일을 생성한다.
firebase init hosting 을 한번 더 해주면
firebase init hosting 을 한번 더 해주면
=== Hosting Setup
Your public directory is the folder (relative to your project directory) that
will contain Hosting assets to be uploaded with firebase deploy. If you
have a build process for your assets, use your build's output directory.
? What do you want to use as your public directory? public
? Configure as a single-page app (rewrite all urls to /index.html)? Yes
✔ Wrote public/index.html
i Writing configuration info to firebase.json...
i Writing project information to .firebaserc...
✔ Firebase initialization complete!
요렇게 몇 가지 더 확인하고 public 아래에 index.html 까지 다 만들어 준다.
firebase.json이 구조 정보가 들어가는 파일인데 package.json 같은 거라고 생각하면 된다.
기본적으로
기본적으로
{
"hosting": {
"public": "public",
"rewrites": [
{
"source": "**",
"destination": "/index.html"
}
]
}
}
요런걸 생성하는데 node_modules도 써야하고 .idea, .gitignore 등등 필요없는 파일/디렉토리를 디플로이하지 않기 위해 ignore를 추가하고 public 위치도 ./app으로 바꿔본다.
{
"hosting": {
"public": "app",
"ignore": [
"firebase.json",
"**/.*",
"**/node_modules/**"
]
}
}
https://firebase.google.com/docs/hosting/deploying 에서 북봍해서 적용해보자.
디폴트 경로는 public이 키인 ./app 아래에 index.html 하나 넣어보자.
ignore에 있는 내용은 실제 디플로이 되지 않는다.
디플로이 하자.
firebase deploy
너무 간단하다. 할말이 없다.
<project명-난수숫자키>.firebaseapp.com 으로 접속할 수 있다.
$ firebase deploy
=== Deploying to 'sheepals-2f2d6'...
i deploying hosting
i hosting: preparing app directory for upload...
✔ hosting: 1 files uploaded successfully
i starting release process (may take several minutes)...
✔ Deploy complete!
Project Console: https://console.firebase.google.com/project/sheepals-2f2d6/overview
Hosting URL: https://sheepals-2f2d6.firebaseapp.com
마지막에 나온 Hosting URL로 접근해서 잘 나오면 오케이.
다음 내용을 보면서 functions와 custom domain을 숙지하고 계속 나아가자.
댓글
댓글 쓰기